Embarking on your *Tower Blitz* journey, you'll start with a single tower but quickly unlock a diverse arsenal, each with unique strengths and weaknesses. To help you craft the perfect strategy tailored to your playstyle, we've meticulously compiled a comprehensive tier list of all the towers available in *Tower Blitz*.
All Towers In Tower Blitz Ranked
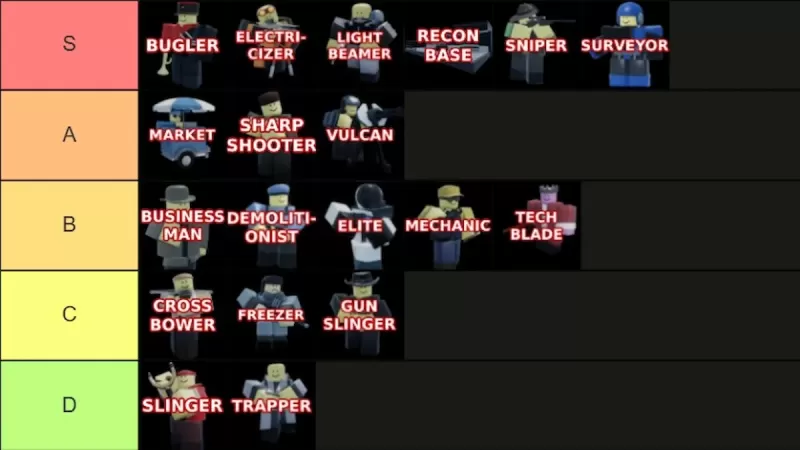
We've ranked all the towers from S-Tier to D-Tier based on their capabilities, upgrade paths, cost, and overall efficiency. **S-Tier** towers are the cream of the crop, virtually ensuring victory on any map when used effectively. **A-Tier** towers are solid choices, though they have certain limitations that keep them from the top spot. **B-Tier** towers are middle-of-the-road, neither exceptional nor poor. **C-Tier** towers have notable drawbacks but can be useful in specific scenarios. **D-Tier** towers are the least effective and should be avoided in most situations. Below, you'll find detailed explanations for each ranking.
S-Tier Towers
| Tower | Cost | Explanation | Pros and Cons |
|---|---|---|---|
 | To unlock the tower: **2500 Tokens** (available at Level 25) To place in-game: **750 Cash** | The Bugler is a powerhouse of support. Despite its exclusive support role, navigating Expert mode without it can be challenging. Its versatility shines when paired with the right towers, although it can't buff Recon Bases. | + Dramatically boosts other towers' performance + Essential in Expert – Exclusively a support tower |
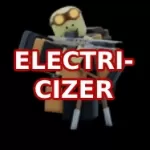 | To unlock the tower: **5500 Tokens** To place in-game: **3800 Cash** | For those who enjoy the precision of a Sniper but crave more firepower, the Electricizer is your go-to. With the game's largest range and damage, it's perfect for dominating late-game waves when placed strategically. | + Massive power and range + Dual-purpose: support and damage – High cost |
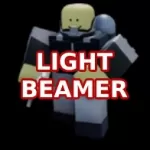 | To unlock the tower: **Complete the contract** To place in-game: **1800 Cash** | Similar to the Electricizer, the Lightbeamer stands out as one of the strongest towers. Position it along a straight path to unleash its devastating death ray. Both upgrade paths are excellent, making it a game-changer with the right placement. | + Exceptionally strong + Excellent crowd control – Not viable in early game – Expensive |
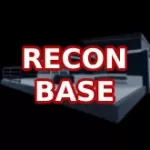 | To unlock the tower: **8000 Tokens** (available at Level 45) To place in-game: **1000 Cash** | The Recon Base offers incredible value, spawning multiple units that grow stronger with upgrades. Both upgrade paths are formidable, making it a key component for success on all difficulties except Normal, despite its steep upgrade costs. | + Continuously spawns units + Both paths are overpowered + Ideal for Expert – Extremely expensive upgrades |
 | To unlock the tower: **1500 Tokens** To place in-game: **500 Cash** | The Sniper is unmatched in the early game. Though some might find it slow, the bottom path enhances its speed. Its versatility extends into mid and late-game, particularly crucial on Expert mode. | + Top early-game tower + Usable throughout the game + High piercing damage – Slightly slow |
 | To unlock the tower: **Complete the contract** To place in-game: **700 Cash** | The Surveyor's versatility is unmatched. Whether you choose the support-focused top path or the damage-oriented bottom path, it remains a valuable asset from start to finish, shaping your strategy throughout the game. | + Highly versatile + Usable from start to finish – Limited to four placements |
A-Tier Towers
| Tower | Cost | Explanation | Pros and Cons |
|---|---|---|---|
 | To unlock the tower: **1000 Tokens** To place in-game: **650 Cash** | The Market is a valuable asset if mastered correctly. While the bottom path can lead to financial losses, the top path is the key to generating consistent income, vital in all game modes, especially multiplayer. | + Essential in all games, particularly multiplayer + Profitable – Bottom path can be misleading – Slow initial money generation |
 | To unlock the tower: **1300 Tokens** To place in-game: **600 Cash** | The Sharpshooter excels early on, efficiently managing groups of enemies. Its wide range covers initial threats well, though its piercing damage is modest. Position it strategically to ease into the mid-game. | + Strong crowd control and damage + Ideal for beginners – Less effective in Expert – Low defense piercing |
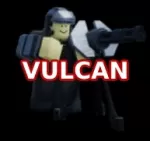 | To unlock the tower: **3000 Tokens** To place in-game: **2500 Cash** | The Vulcan is a solid mid to late-game option. Opt for the bottom path to maximize its damage potential, reaching up to 140 DPS and full defense pierce. Despite its slow initial growth, it becomes a formidable force. | + High strength + Versatile – Slow to become powerful – No flying detection |
B-Tier Towers
| Tower | Cost | Explanation | Pros and Cons |
|---|---|---|---|
 | To unlock the tower: **Complete the contract** To place in-game: **800 Cash** | The Businessman offers a dual role, generating income and dealing damage, though it falls short compared to the Market for money and other towers for damage. It pairs well with Recon Base but is easily outclassed. | + Generates money and deals damage + Suitable for early game – Easily replaced |
 | To unlock the tower: **3500 Tokens** To place in-game: **900 Cash** | The Demolitionist is effective early on, handling groups with high piercing damage. However, it quickly becomes outdated as better options emerge, and it lacks flying detection, limiting its utility. | + Effective crowd control and piercing damage – Obsolete after early game – No flying detection |
 | To unlock the tower: **Complete the contract** To place in-game: **1200 Cash** | Similar to the Vulcan but less versatile, the Elite's bottom path maximizes its potential. Be cautious of its long cooldown, which can hinder its effectiveness if not managed properly. | + Strong bottom path – Long cooldown – Expensive |
 | To unlock the tower: **Complete the contract** To place in-game: **480 Cash** | The Mechanic shines in the mid-game with its variety of turrets, though only the Tesla turrets make a significant impact. Despite its strategic value, it's cost-inefficient for the long term. | + Useful in mid-game – Not cost-efficient |
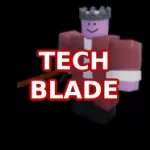 | To unlock the tower: **Free** (available at Level 10) To place in-game: **400 Cash** | The Techblade is a melee tower adept at handling early-game crowds and tanks. Its effectiveness is hampered by its short range and slow speed, making it less ideal for melee engagements. | + Effective crowd control + Efficient early game – Limited range – Slow |
C-Tier Towers
| Tower | Cost | Explanation | Pros and Cons |
|---|---|---|---|
 | To unlock the tower: **200 Tokens** To place in-game: **400 Cash** | The Crossbower is a decent choice for beginners or as an alternative to the Slinger in early game. Its long range and ability to handle groups are its strengths, but its damage remains disappointingly low even after upgrades. | + Affordable and suitable for beginners + Long range – Limited to early game – Poor damage output |
 | To unlock the tower: **450 Tokens** To place in-game: **400 Cash** | The Freezer can be useful when paired with high-DPS towers, especially against fast enemies. However, once enemies gain freeze immunity, its utility diminishes, making it less valuable in later stages. | + Effective against fast enemies – Becomes obsolete post-early game – Limited to specific enemy types |
 | To unlock the tower: **500 Tokens** To place in-game: **400 Cash** | Another melee tower, the Gunslinger suffers from slow attack speed and short range. While the top path can extend its range, it comes at the cost of reduced damage, making it viable only in Normal mode. | + Decent top path – Short range – Ineffective in Hard or Expert |
D-Tier Towers
| Tower | Cost | Explanation | Pros and Cons |
|---|---|---|---|
 | To unlock the tower: **Free** To place in-game: **200 Cash** | The Slinger is designed as a starter tower to introduce new players to the game. Its utility is limited to the very early stages, after which it becomes ineffective and should be replaced quickly. | + Free – Poor damage and firing speed, even at max level – Useless after initial waves |
 | To unlock the tower: **1000 Tokens** (available at Level 10) To place in-game: **500 Cash** | The Trapper's high unlock cost and level requirement don't reflect its performance, as it struggles to defeat even the weakest enemies. It's overshadowed by other towers that are both more effective and less expensive. | + Moderate bottom path – Not cost-effective – Often nearly unusable – Struggles throughout the game |
With our detailed tier list of all the towers in *Tower Blitz*, you're now equipped to develop the best strategy for your playstyle. If you're looking for a boost to get started, our *Tower Blitz* codes can give you the edge you need.